Heat Today will be hot in parts of the Netherlands: up to 34 degrees! Check whether your reservoir is still full, whether the mix is still moist, shade vulnerable plants around midday, and wait with sowing until it cools down.
Instruction manual
MM-Hero or MM-Bamboo garden box
- 120x60 cm or 120x120 cm
- without bottom plate and legs

⚠ WARNING ⚠
Want to add our trellis?
Then first follow steps 1 to 6 of How to attach your trellis. Do this before you go on to the steps below.
What parts does it come with?
Voor dit product kreeg je 2 pakketten. Dit zit erin:
Basispakket 60x60
Basispakket 60x60
- 4 planken van 66 cm
- 1 rasterset van 60 cm
- 1 anti-onkruiddoek
Connectorset
- 4 hoekstukken van staal
- 16 bouten
- 16 moeren
Basic set for a 60x120 garden box
- 2 planks of 66 cm
- 3 grid strips of 60cm
- 1 grid strip of 120cm
- 3 sets of Chicago screws
- 1 weed mat
Additional plank set
- 2 planks of 126 cm
Connector set
- 4 stainless steel corner pieces
- 16 bolts
- 16 nuts
- 16 washers
Basic set for a 120x120 garden box
- 2 planks of 126 cm
- 6 grid strip of 120 cm
- 9 sets of Chicago screws
- 1 weed mat
Additional plank set
- 2 planks of 126 cm
Connector set
- 4 stainless steel corner pieces
- 16 bolts
- 16 nuts
- 16 washers
What to get from your tool box:
- a wrench (size 13 or adjustable)
- a hammer
Step 1
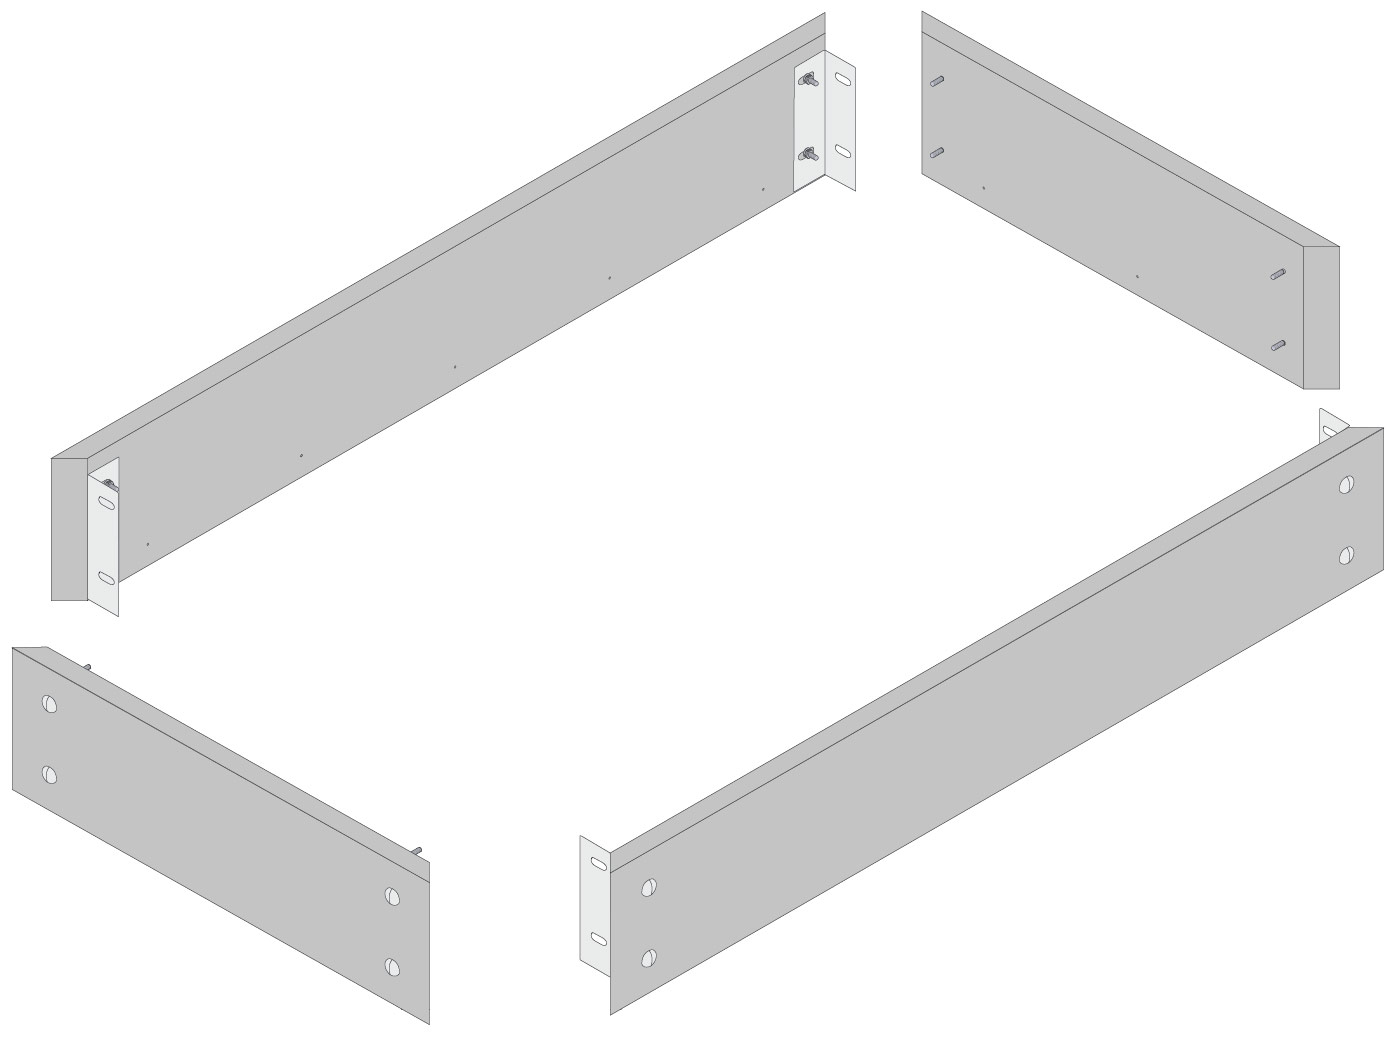
Lay the planks on the ground with the shorter side up.
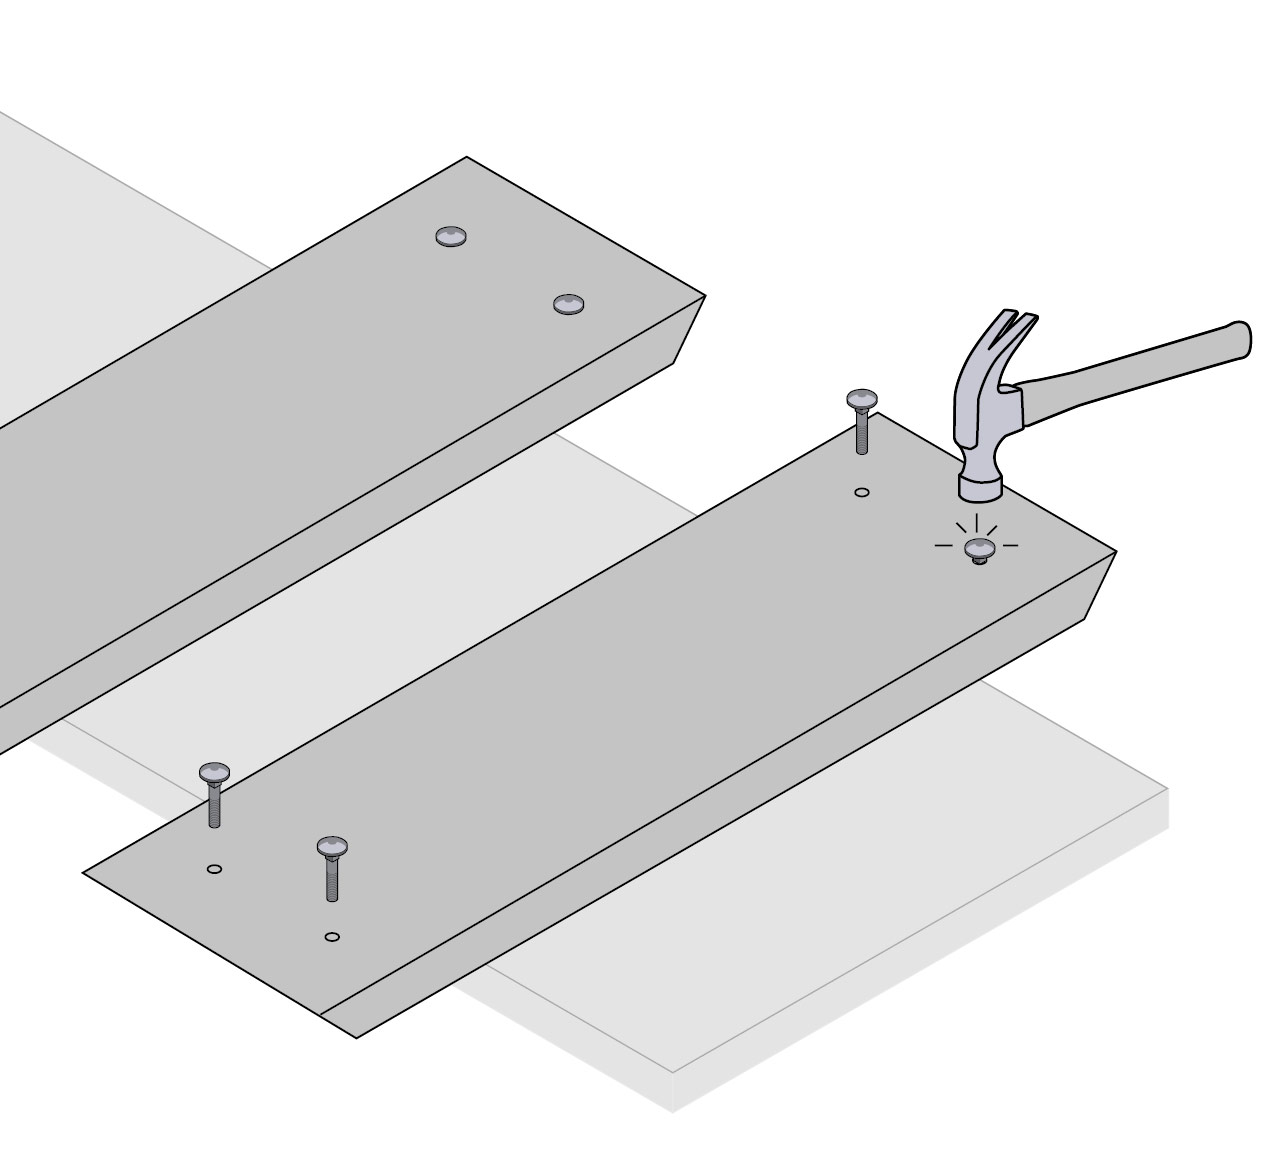
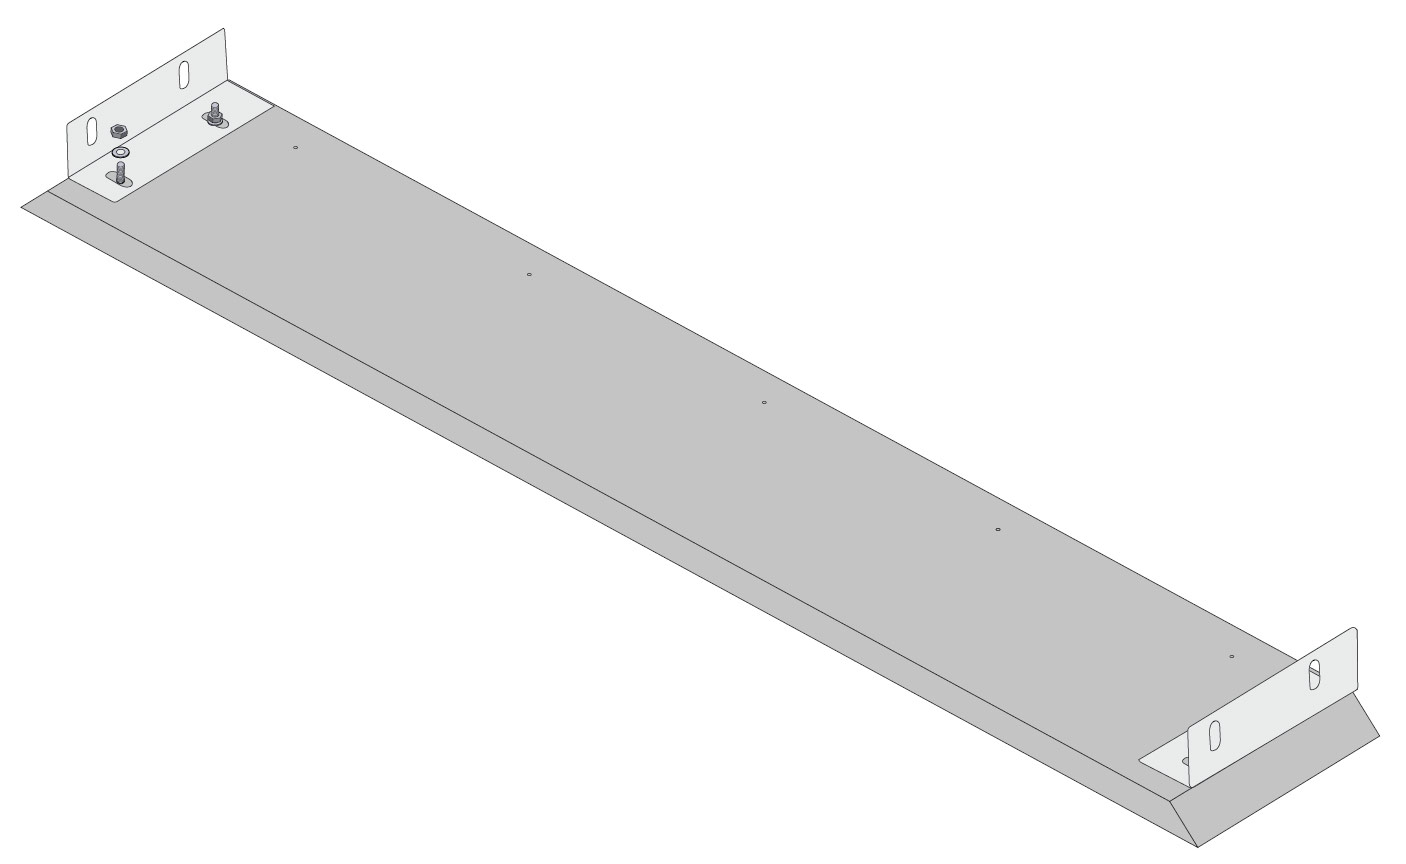
Secure the 4 planks together with the bolts and nuts.
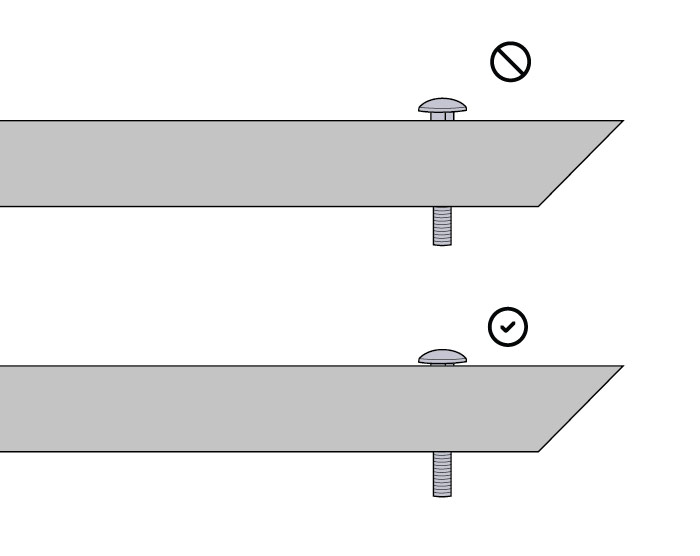
To do this, first insert the bolts from bottom to top, put the washer on, and then screw on the nut. Tighten it by hand, not too tightly yet.
It's easiest if you screw the corner pieces onto the 2 (long) side planks first. Align the legs well on the corners of the board:
Secure the 4 planks together with the bolts and nuts.
To do this, first insert the bolts from bottom to top, put the washer on, and then screw on the nut. Tighten it by hand, not too tightly yet.
It's easiest if you screw the corner pieces onto the 2 (long) side planks first. Align the legs well on the corners of the board:
Step 2
Lay the planks on the ground with the shorter side up.
Secure the 4 planks together with the bolts and nuts.
To do this, first insert the bolts from bottom to top, put the washer on, and then screw on the nut. Tighten it by hand, not too tightly yet.
It's easiest if you screw the corner pieces onto the 2 (long) side planks first. Align the legs well on the corners of the board:
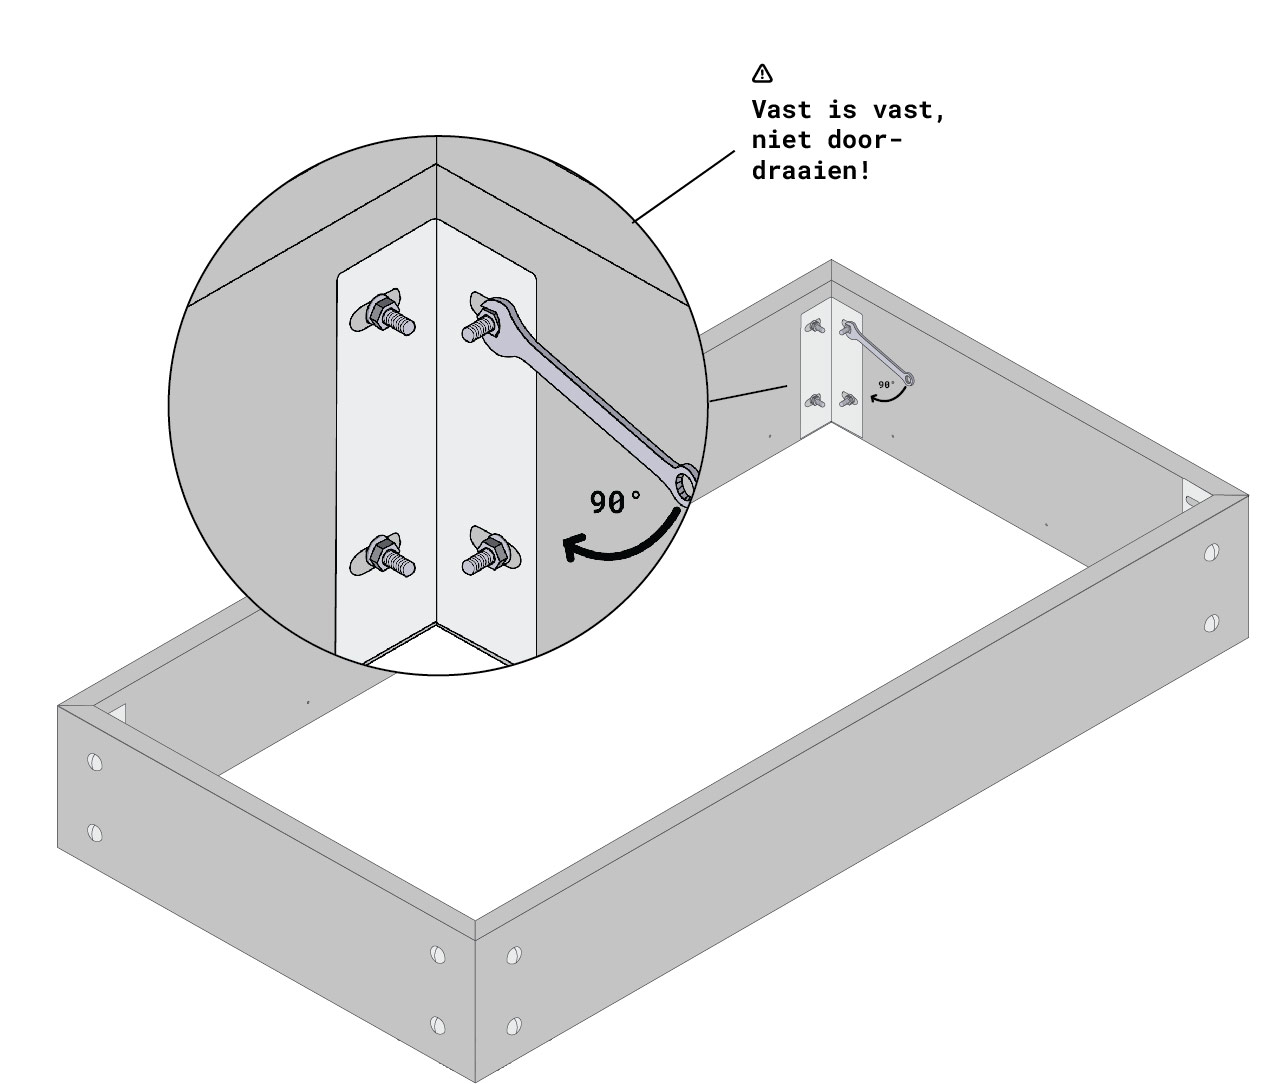
Place the container upright on a flat surface. Make sure the corners are as close together as possible.
Now tighten the bolts. First, do this as far as possible by hand and then tighten them further with a wrench a quarter turn. It does not have to be any tighter.
Do not tighten them with a drill. Once they're tightened, there's no going back.
Now tighten the bolts. First, do this as far as possible by hand and then tighten them further with a wrench a quarter turn. It does not have to be any tighter.
Do not tighten them with a drill. Once they're tightened, there's no going back.
Step 3
Find a good spot for your vegetable garden box.
You need a sunny area that gets at least 6 hours of sunlight. You can read more here about how to choose the best spot.
You need a sunny area that gets at least 6 hours of sunlight. You can read more here about how to choose the best spot.
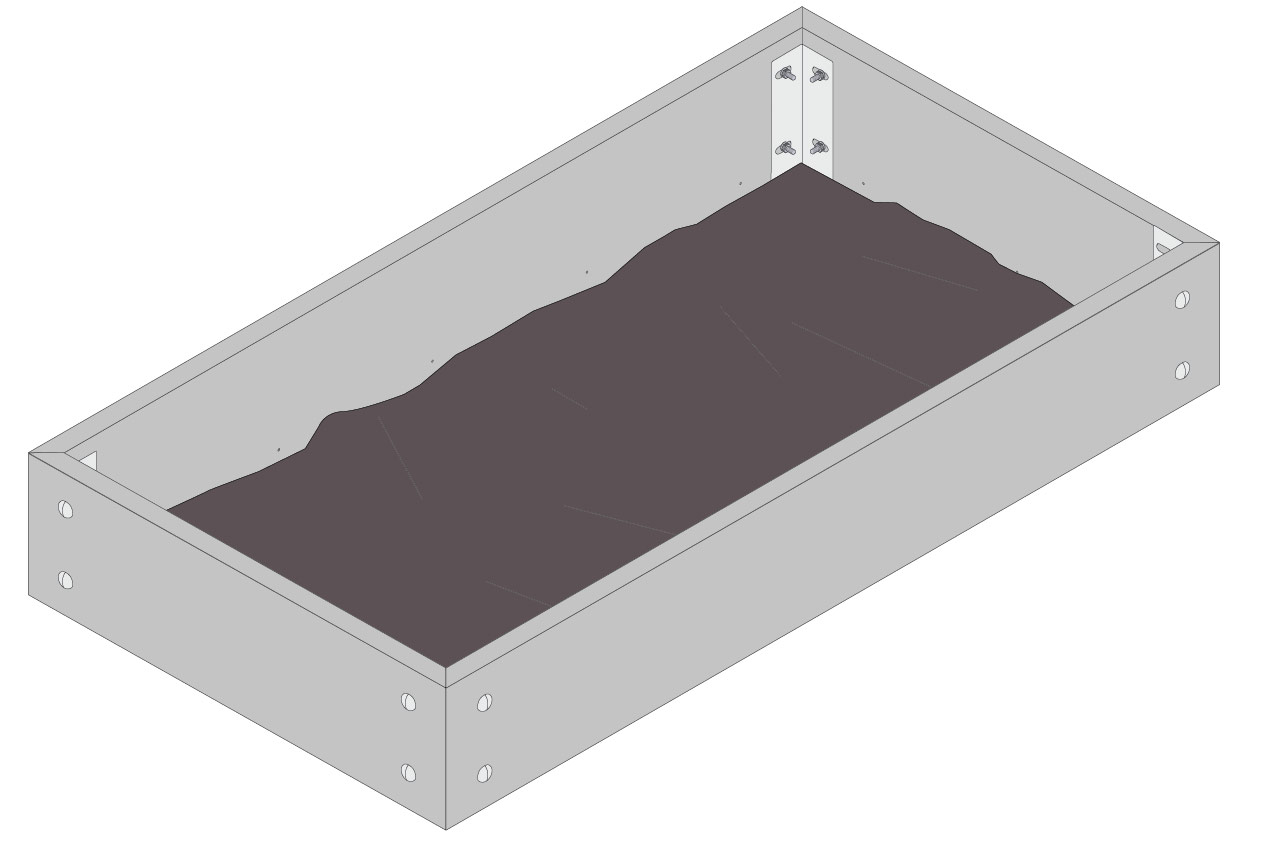
Place your weed mat on the bottom of the garden box. Fold the edges up a bit if needed.
Adding a trellis (MM-Klimrek) to your vegetable garden box? Then add the trellis to the northern side of your box. This way your tall climbing plants won't overshadow your other vegetables.
Adding a trellis (MM-Klimrek) to your vegetable garden box? Then add the trellis to the northern side of your box. This way your tall climbing plants won't overshadow your other vegetables.
Step 4
Fill your garden box with MM-Mix.
Make the soil mix damp - but not soaking wet - and loosen it up with a garden spade.
The soil mix is so good, you don't need to replace it. If it gets more compact over time, you can top it off with more mix. To keep it rich in nutrients, you'll add some MM-Plantfood once in a while. The app will tell you when to give it this extra boost.
Step 6
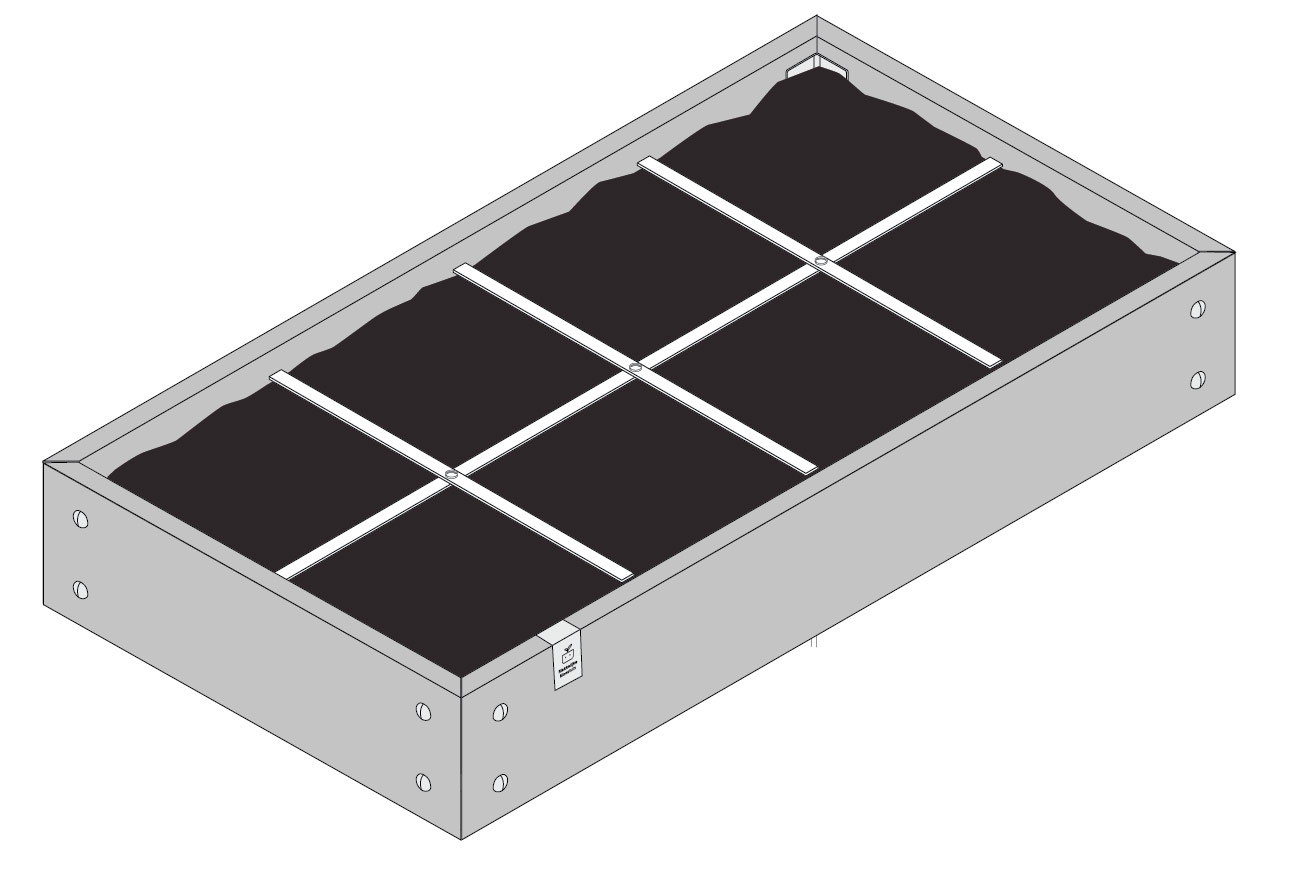
Lay the grid loosely on top of the soil mix. Add your logo clip to the side for the finishing touch.
Tadaa
Now your garden is ready for sowing and planting.
Have fun!