Heat Today will be hot in the south of the Netherlands: up to 33 degrees! Check whether your reservoir is still full, whether the mix is still moist, shade vulnerable plants around midday, and wait with sowing until it cools down.
Attaching a trellis to your MM-Hero or MM-Bamboo
⚠ Are you about to add your trellis to a new MM-Hero or MM-Bamboo?
Then first attach the brackets to the side planks (steps 1 to 6) before assembling the garden box or table. Only go to steps 7 and 8 after you've placed your garden box in its permanent spot.
The process will be a little less handy, but it's no big deal 🙂
You just need to first scoop out the soil mix where the trellis will go, so you can reach this area easily.
You just need to first scoop out the soil mix where the trellis will go, so you can reach this area easily.
- 4 pipes of 100 cm
- 1 pipe of 126 cm
A brown box with:
- 1 net
- 1 set of tie wraps
- 4 brackets
- 2 corner pieces
- 2 double internal connecting pieces (4 parts in total)
- 2 hex keys
- 4 impact nuts
- 4 socket head bolts
- 1 paper template for drilling
What do you need to get from your toolbox?
- power drill with 10 mm drill bit (and a smaller +/- 3 mm drill bit for pre-drilling)
- hammer
- scissors
- tape
- screwdriver or awl (or any tool for poking holes will do. Even a drill bit should work.)
Tip: Don't have a 10 mm drill? Try borrowing one from a neighbor. You can offer them delicious tomatoes in exchange 🙂 You can also use an 8 mm drill and gently wiggle it back and forth to make the hole a little bigger.
Step 1
Take the two side planks of the garden box. For a 120x60 cm box these are the 60 cm planks. For a 120x120 cm box, it doesn't matter which two you use 🙂
Step 2
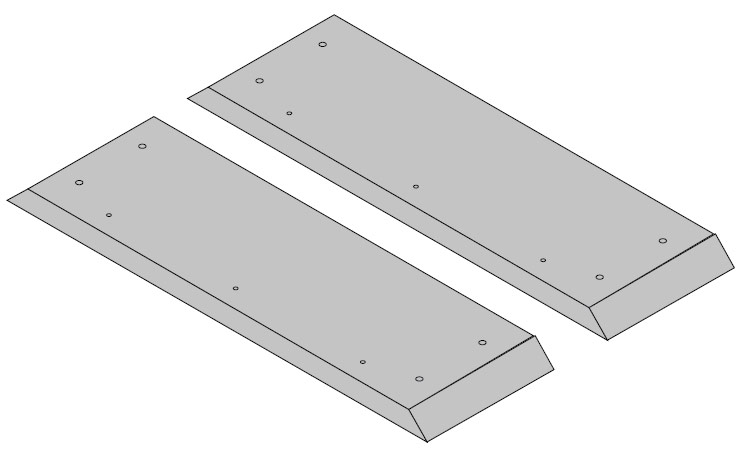
Lay the 2 planks flat on the ground with the longest side facing down.
Step 3
Cut the outer edges of the paper template off and discard them. Then cut the template in half.
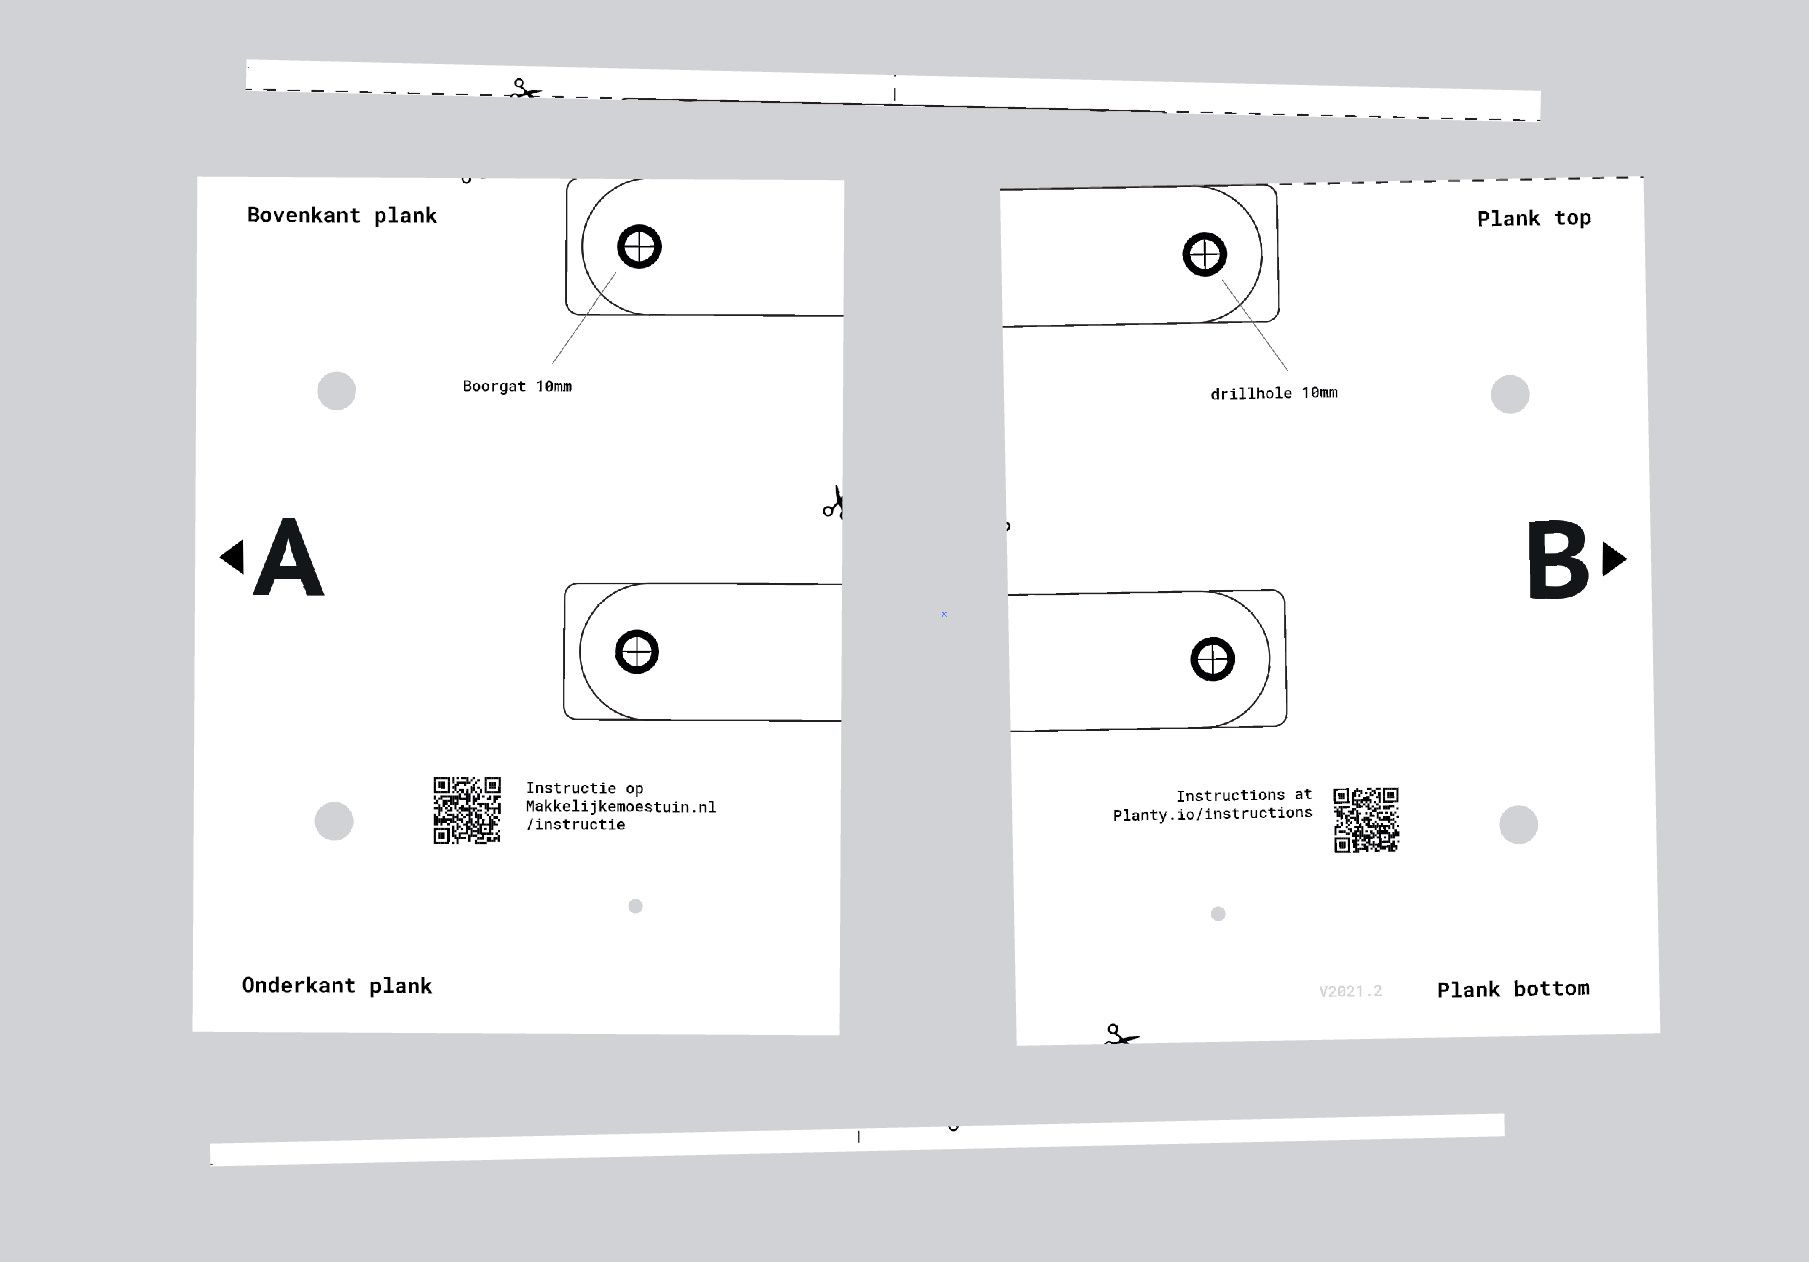
Tape the template to the planks:
- the side with the A should point toward the left side of the plank
- the side with the B should point toward the right side of the plank
Make sure the long side with the pre-drilled holes along the bottom runs underneath the letters (see the checkmark in the picture):

There are 4 points on the paper template that indicate where your holes should go. Before drilling anything, use your screwdriver, awl, or just the drill bit to poke through the paper and mark the plank. These markings will show you where you need to drill later on.
Mark the plank by poking 4 holes through the paper template. When done, remove the template.
Mark the plank by poking 4 holes through the paper template. When done, remove the template.
Step 4
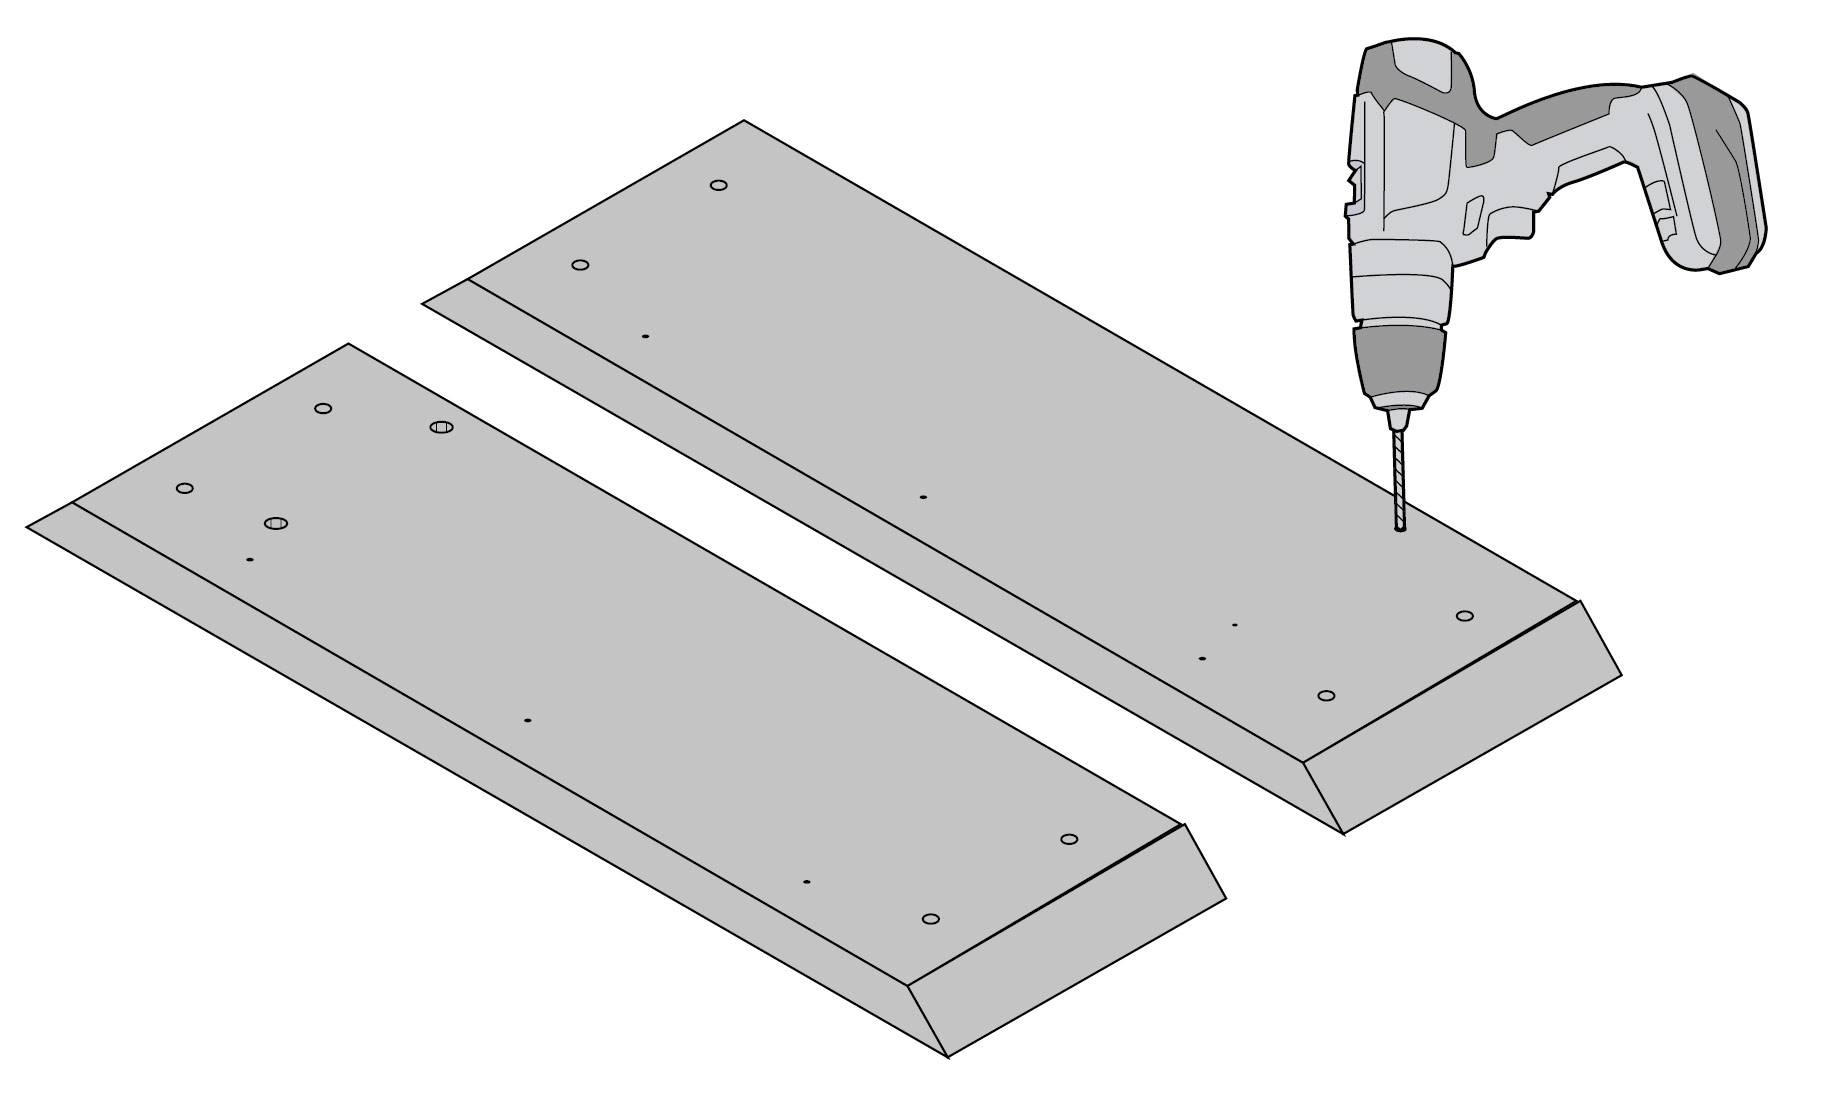
Next, you'll drill 2 holes through each plank using the marks you just made.
First, use the smaller drill bit to pre-drill the holes. Then use the 10 mm drill bit to make each hole the right size. Drill 4 holes in total, and drill completely through the planks.
Tip: If you're going to drill an MM-Hero outside in your garden, place the weed mat along the bottom first. That way you'll catch the pieces of plastic and can throw them away when you're done. You don't necessarily need to collect the sawdust from drilling an MM-Bamboo, it will decompose by itself.
Tip: If you're going to drill an MM-Hero outside in your garden, place the weed mat along the bottom first. That way you'll catch the pieces of plastic and can throw them away when you're done. You don't necessarily need to collect the sawdust from drilling an MM-Bamboo, it will decompose by itself.
Step 6
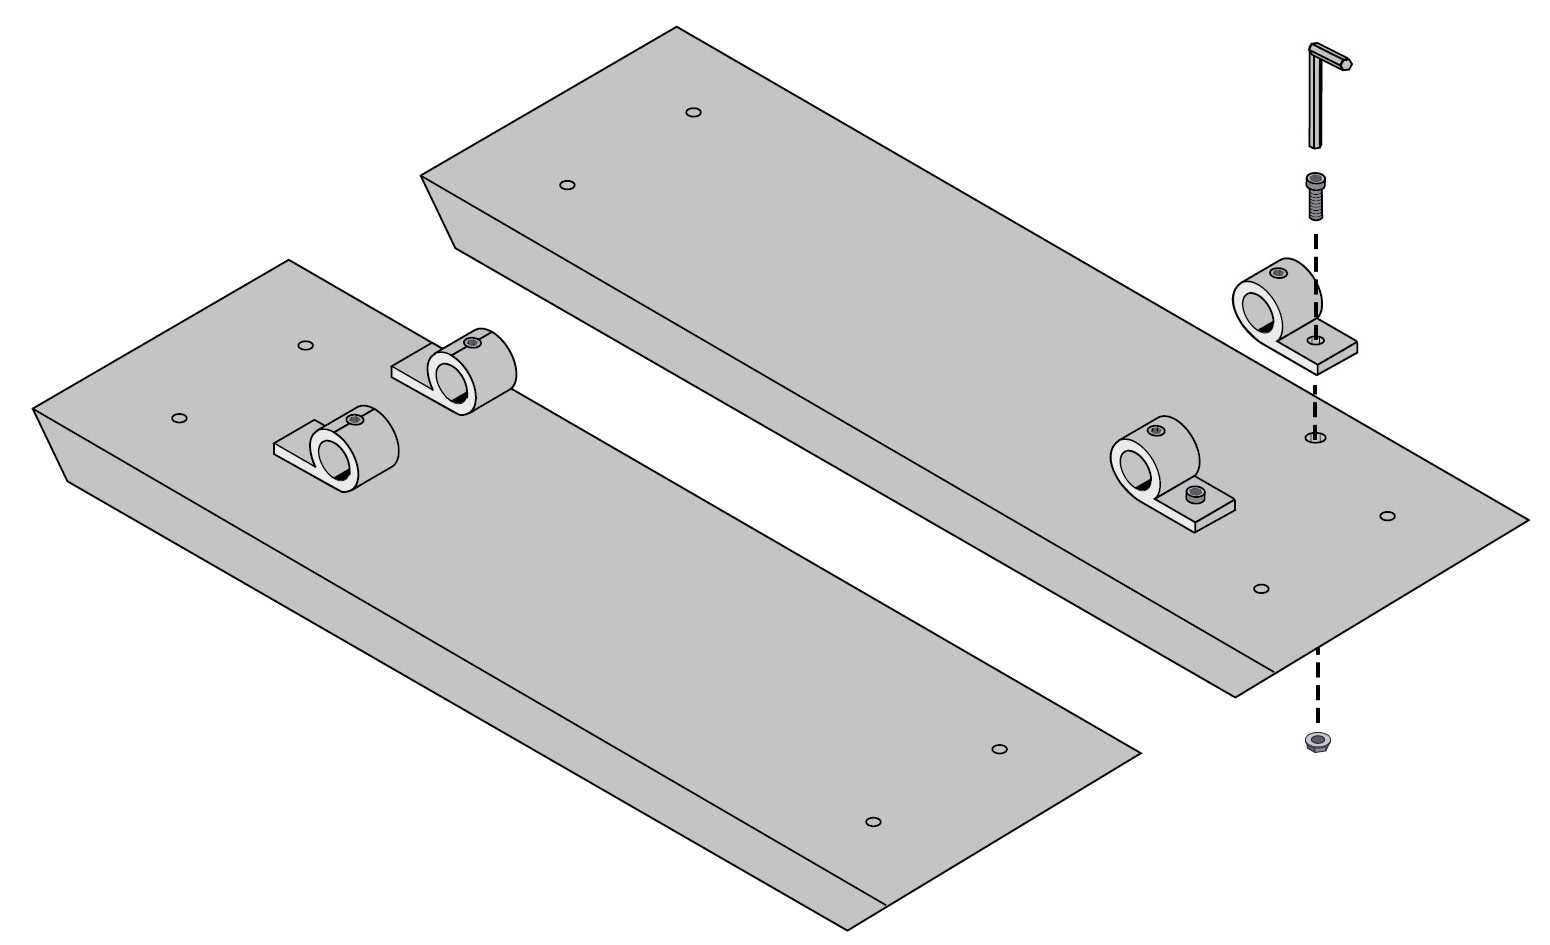
Flip your planks over, so the long sides are facing up.
Attach your brackets to the planks with the socket head bolts. Use the hex key to loosely screw the bolts in.
Do not tighten the bolts yet.
Do not tighten the bolts yet.
Set up your garden box
→ Instructions for assembling your MM-Hero or MM-Bamboo garden box
→ Instructions for assembling your MM-Hero or MM-Bamboo table
If your garden box or table is assembled and placed where you want it, then go ahead with Step 7.
→ Instructions for assembling your MM-Hero or MM-Bamboo table
If your garden box or table is assembled and placed where you want it, then go ahead with Step 7.
Step 7
So, your garden box is in place, and the brackets for the trellis are already attached.

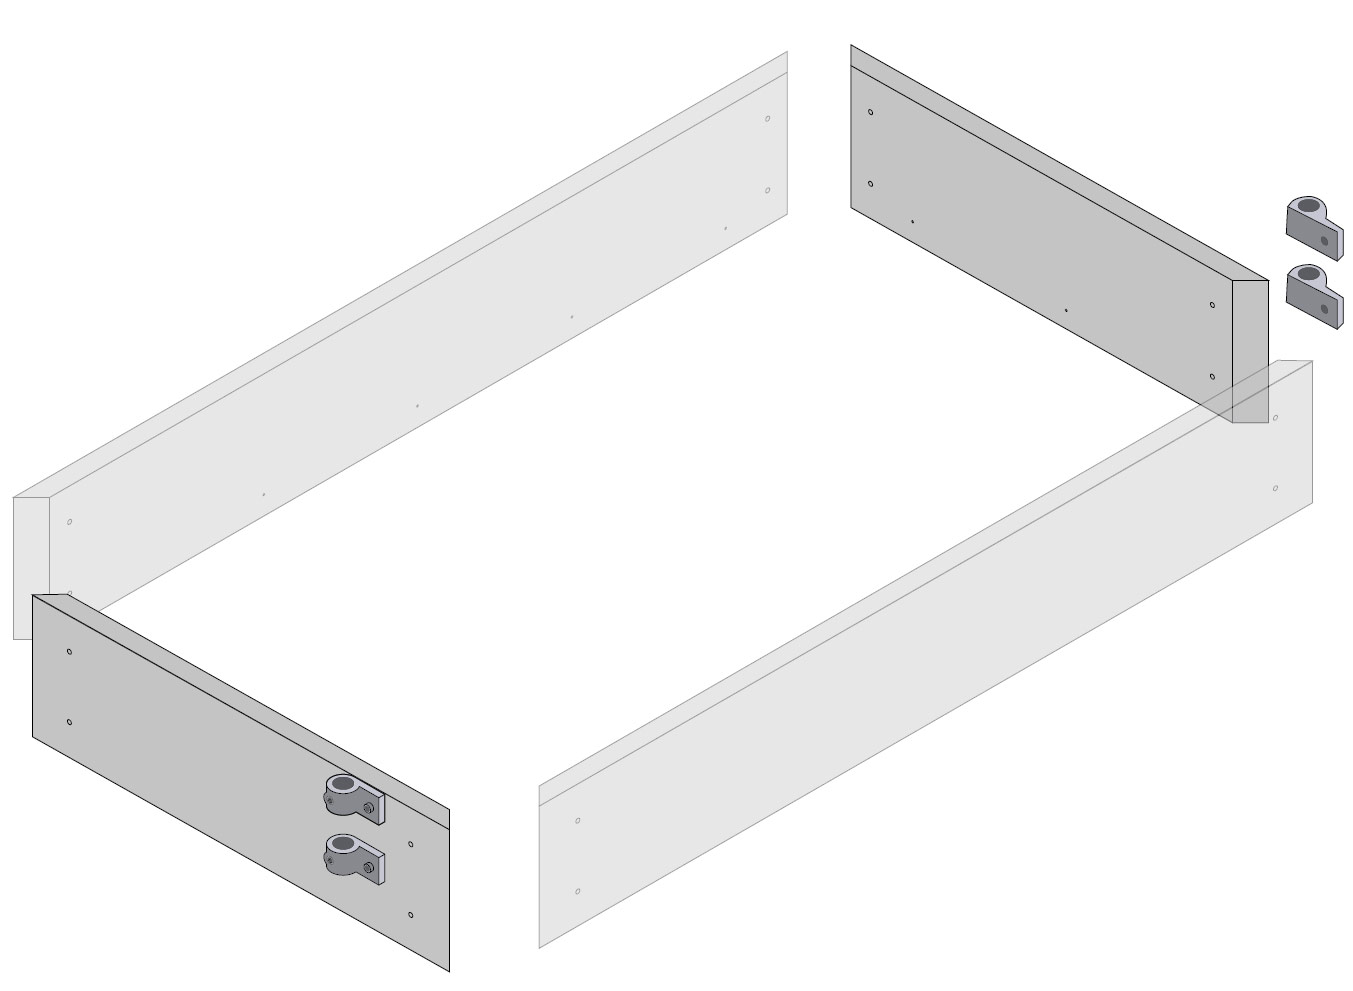
Next, connect the corner pieces to the ends of the 126 cm pipe (the longest pipe). Use the hex key to secure them.
Put 2 of the 100 cm pipes through each of the brackets. (If this isn't easy to do, loosen the brackets' hex screws. Wiggle them back and forth a bit.)
Then put the remaining 100 cm pipes on top of the pipes you just installed. Use the internal double connectors and hex key to gently connect the pipes (see picture above).
Then, put the long pipe with the corner pieces on top to complete the frame. Secure the bolts in the connectors firmly with the hex key.
Straighten the trellis and tighten the bolts in the brackets extra firmly.
Step 8

Attach the net to the frame with the tie wraps. Start with the corners and don't pull the tie wraps too tight yet. Then continue with the top and sides, alternating left and right. This way you hang the net nice and evenly on the frame.
Tip: To tighten the net at the bottom, tie a few tie wraps together and attach them to the brackets.
Now pull all the tie wraps tight and cut off the ends that stick out.
Tip: To tighten the net at the bottom, tie a few tie wraps together and attach them to the brackets.
Now pull all the tie wraps tight and cut off the ends that stick out.
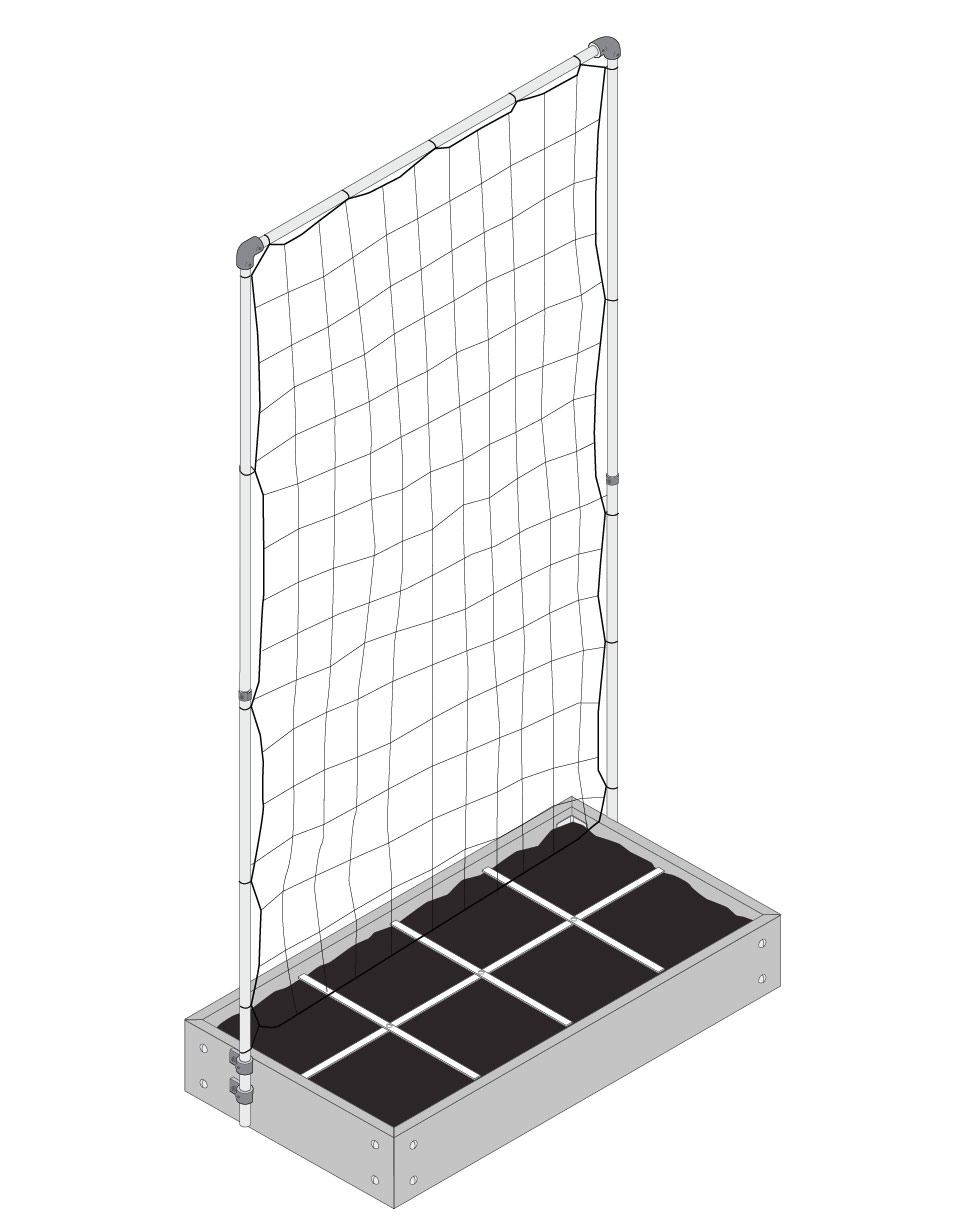
Tadaa
Your MM-Klimrek is all set. Now you have a super sturdy trellis, strong enough for tons of tomatoes, peas, zucchini, even pumpkins. Yes, pumpkins!
Have fun and enjoy!