Heat Today will be hot in the south of the Netherlands: up to 33 degrees! Check whether your reservoir is still full, whether the mix is still moist, shade vulnerable plants around midday, and wait with sowing until it cools down.
Instruction manual: MM-Hero or MM-Bamboo garden table
60x120 cm garden table with legs and bottom. These instructions work for your 120x120 cm table too.

⚠ Want to add a trellis?
Zet je ons klimrek op deze bak?
Then first follow steps 1 to 6 of How to attach your trellis. Do this before you go on to the steps below.
What parts does it come with?
Basics for 60x120 box
- 2 planks of 66 cm
- 3 sets of Chicago screws
- 3 grid strips of 60cm
- 1 grid strip of 120cm
- 1 weed mat
Additional plank set
- 2 planks of 126 cm
Connector set
- 16 bolts
- 16 nuts
- 16 washers
Base plate and legs set
- 4 stainless steel legs
- 2 stainless steel L-shaped profiles of 50cm
- 2 stainless steel L-shaped profiles of 110cm
- 1 steel base plate of 60x120cm
- 16 screws
Basic set for a 120x120 garden box
- 2 planks of 126 cm
- 9 sets of Chicago screws
- 6 grid strip of 120 cm
- 1 weed mat
Additional plank set
- 2 planks of 126 cm
Base plate and legs set
- 4 stainless steel legs
- 4 stainless steel L-shaped profiles of 110cm
- 2 steel base plates of 60x120 cm
- 20 screws
- 2 shorter carriage bolts
- 2 nuts
- 2 washers
- 1 base bar
- Connector set with:
- 16 bolts
- 16 nuts
- 16 washers
What to get from your tool box:
- a wrench (size 13 or adjustable)
- Phillips screwdriver or drill bit
- hammer
Tip: zet je bak in elkaar op de uiteindelijke plek
Het goed uitlijnen van een tafelbak is belangrijk en doe je ook het beste op de definitieve plek. Want wil je de hoeken van de planken mooi laten aansluiten, dan moet alles recht staan: de bak zelf maar vooral ook de poten. Doe je dat eerst op een andere plek en verplaats je dan je bak weer, dan moet je het uitlijnen nogmaals doen.
(Wat eventueel wel kan is de tafelbak elders monteren, de bouten nog niet helemaal strak aandraaien en het echte uitlijnen dan pas op de definitieve plek doen.)
(Wat eventueel wel kan is de tafelbak elders monteren, de bouten nog niet helemaal strak aandraaien en het echte uitlijnen dan pas op de definitieve plek doen.)
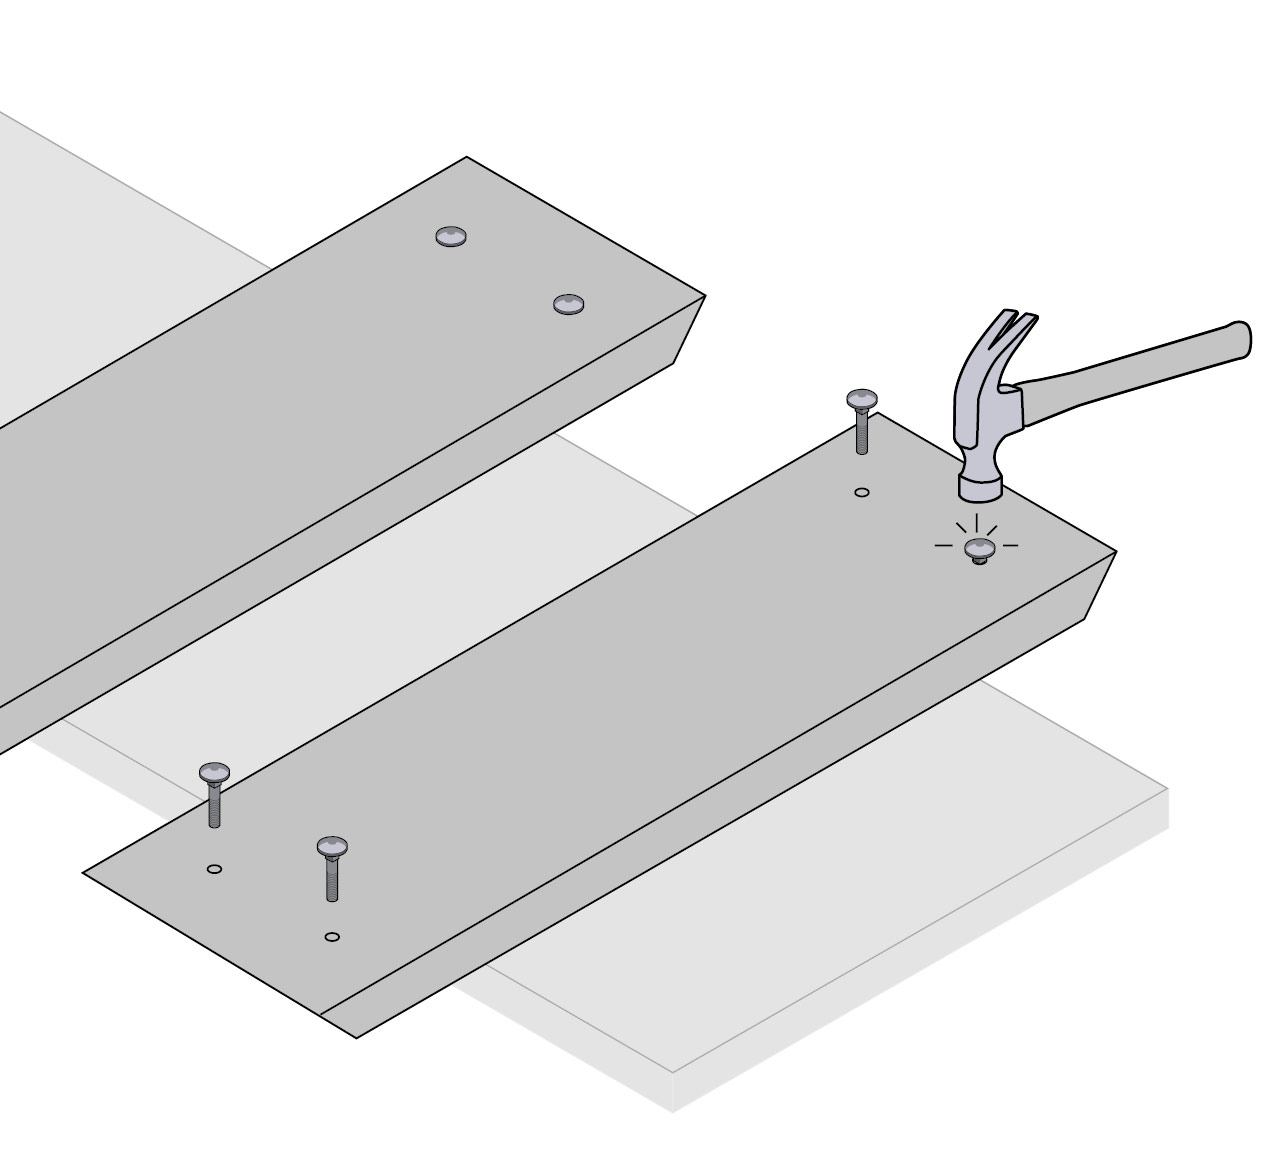
Step 1
Place the planks with the long side up and elevated (between 2 sawhorses, for example). Remove the washers and nuts from the 8 long bolts.
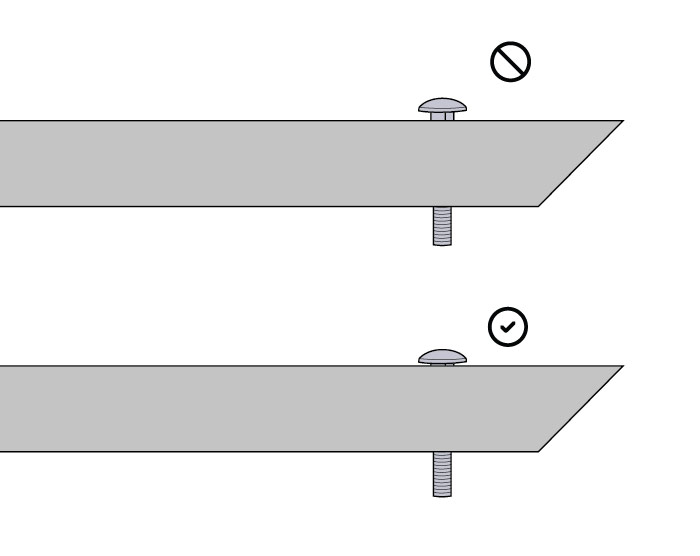
Put the bolts through the holes in all 4 planks and hammer them in. Do this carefully so that you hit the square part of the bolt into the plank.
Put the bolts through the holes in all 4 planks and hammer them in. Do this carefully so that you hit the square part of the bolt into the plank.
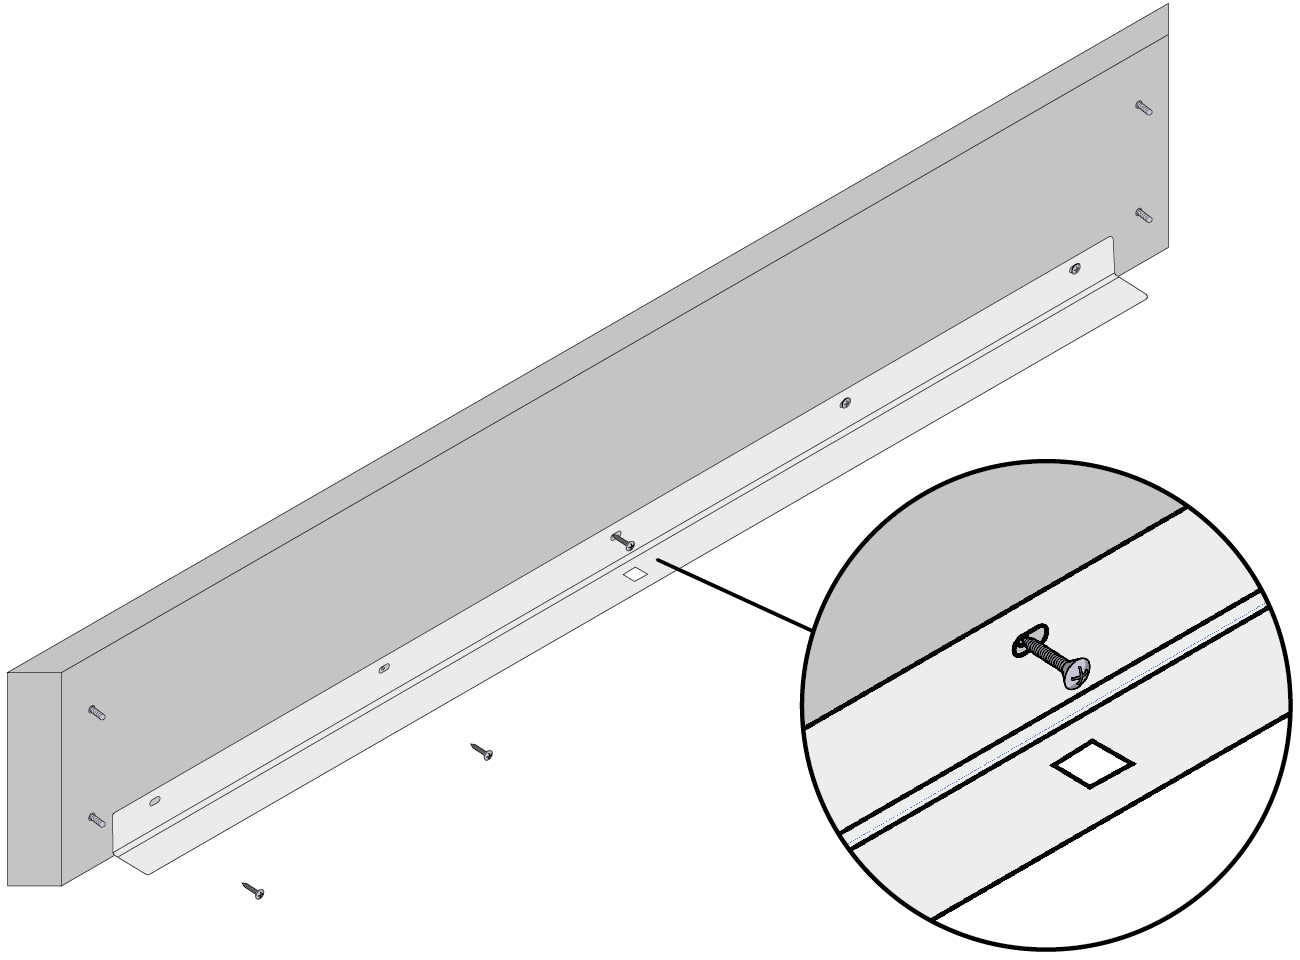
Step 2
Using a screwdriver or drill, loosely screw the L-profiles onto the planks at the pre-drilled holes. Don't screw them in too tightly. Once they're secured, there's no going back 😉
This is more difficult with MM-Bamboo planks because the material is harder than that of the MM-Hero. When using a drill, it's very important that you use a suitable bit. This will prevent you from breaking the screw.
This is more difficult with MM-Bamboo planks because the material is harder than that of the MM-Hero. When using a drill, it's very important that you use a suitable bit. This will prevent you from breaking the screw.
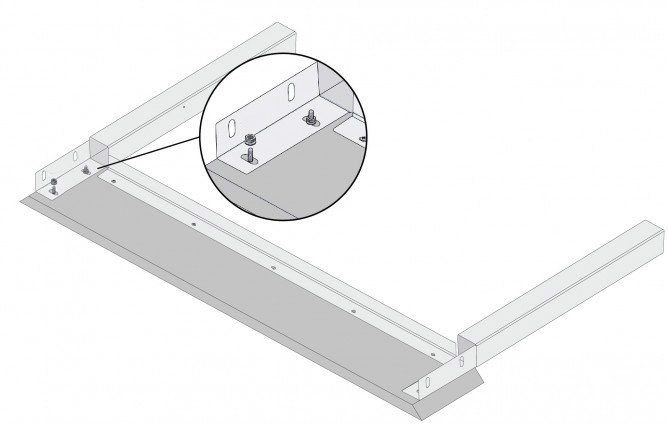
Step 3
Secure the 4 planks to each other using the legs and bolts. (For the 120x120 cm garden table, use the longer bolts provided).
First, put the bolt through the hole in the plank, starting from the outer side. Then loosely attach the steel leg with the washer and nut.
First, put the bolt through the hole in the plank, starting from the outer side. Then loosely attach the steel leg with the washer and nut.
Step 4
Put the garden box upright on a flat surface. Make sure the corners are as close together as possible and straighten the legs - if necessary, use your hammer.
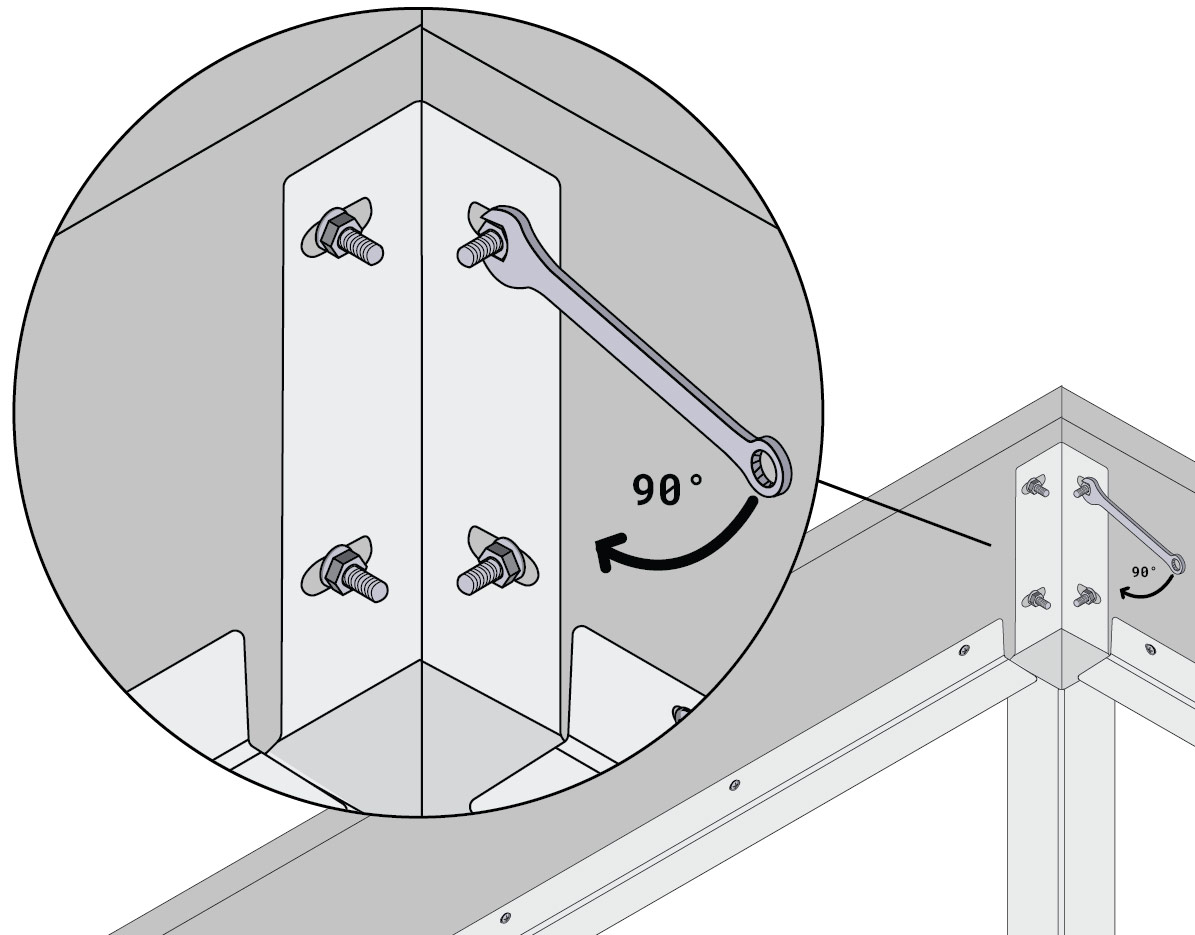
Now tighten the bolts. First, as far as possible by your hand and then tighten them a quarter turn further with a wrench. It doesn't have to be any tighter.
Do not tighten them super tight, and definitely don't use a drill.
Now tighten the bolts. First, as far as possible by your hand and then tighten them a quarter turn further with a wrench. It doesn't have to be any tighter.
Do not tighten them super tight, and definitely don't use a drill.
Step 5 (for the 60x120 garden table)
Put your garden table upright on a flat surface. Lay the base plate along the bottom. If the plate doesn't fit, loosen the corner bolts a little.
Step 5 (for the 120x120 garden table)
Put your garden table upright on a flat surface. Attach the square base bar to 2 of the L-profiles using the short carriage bolts, as shown below.
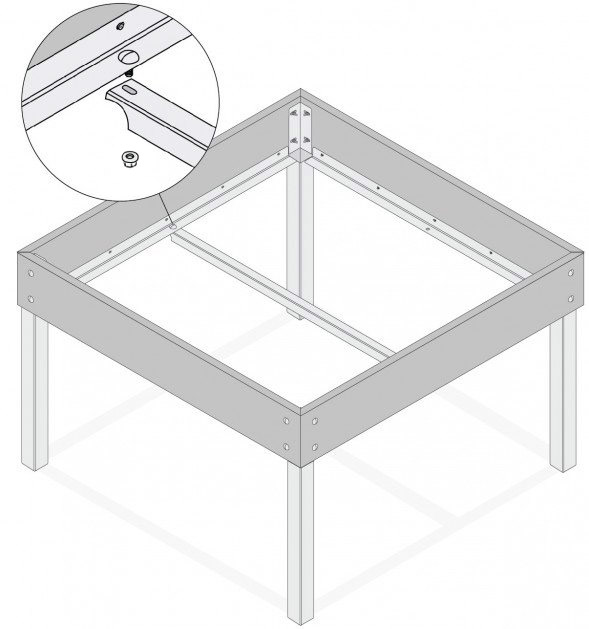
Lay the base plates along the bottom of the garden table. Put the plates perpendicular to the base bar, as shown above.
Step 6
Put your garden table upright on a flat surface. Attach the square base bar to 2 of the L-profiles using the short carriage bolts, as shown below.

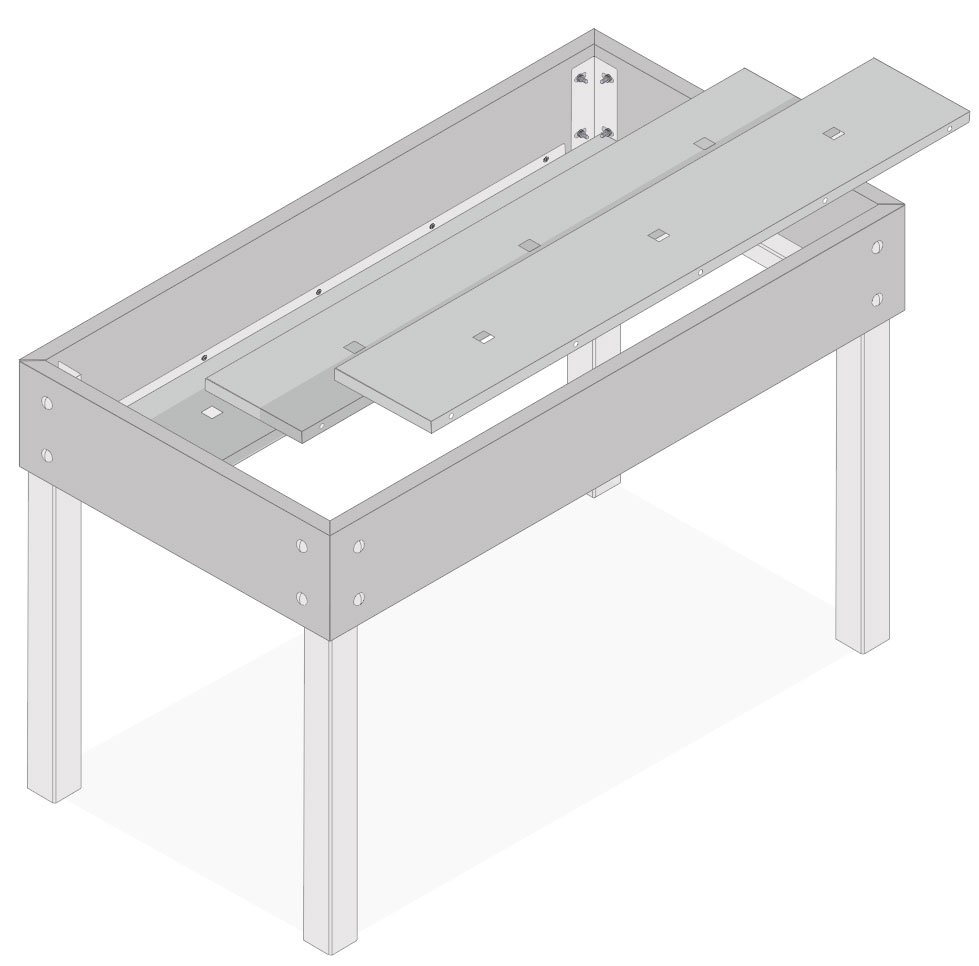
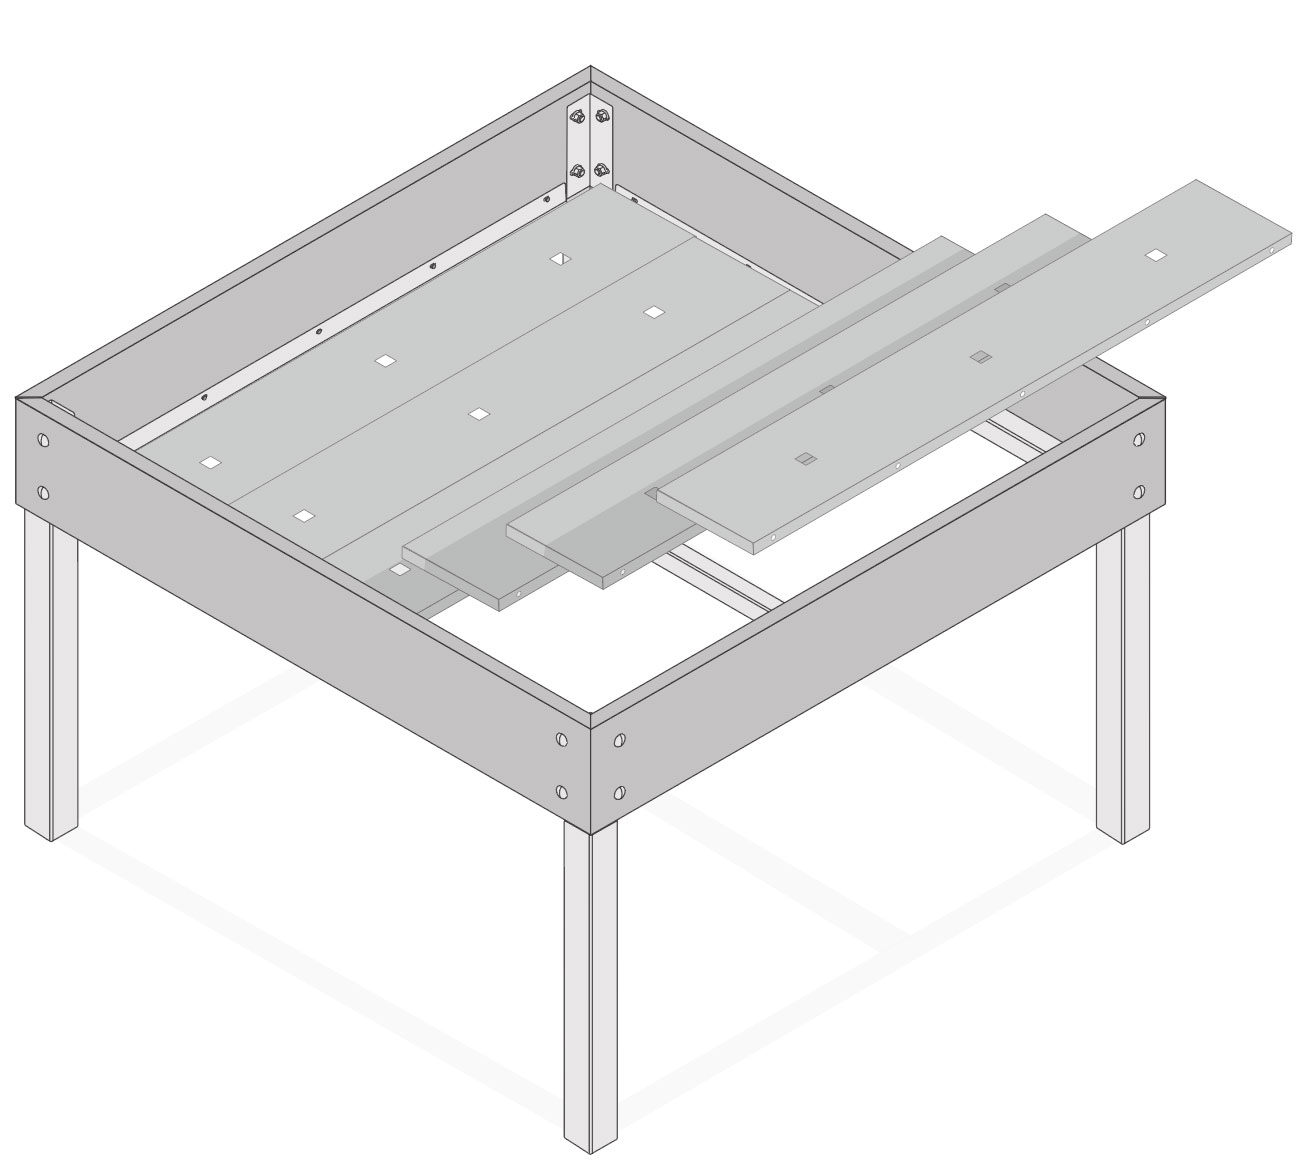
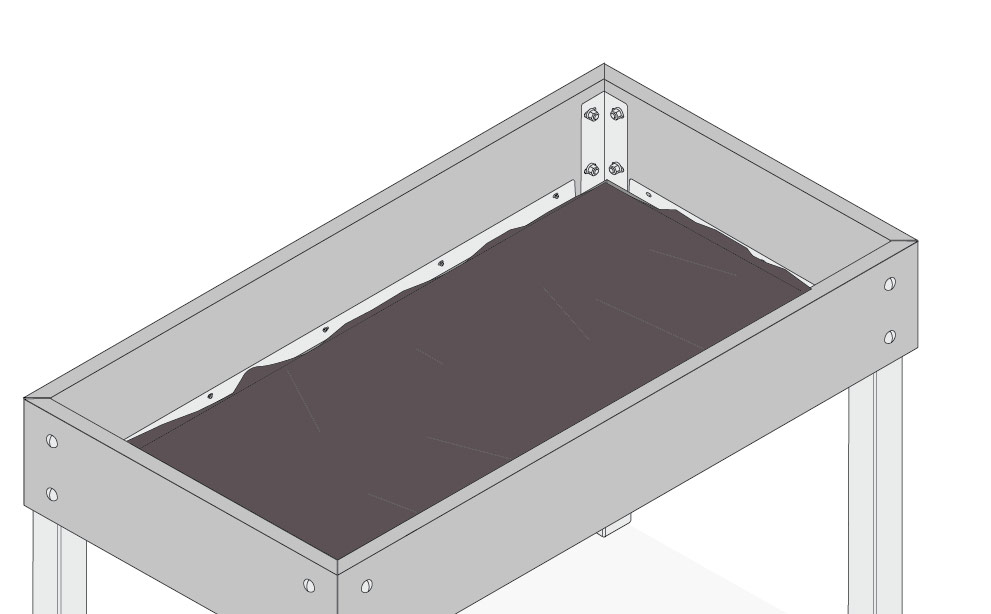
Step 8
Place the weed mat on the bottom of the garden table. Fold the edges up a bit if needed.
Step 9
Fill your garden box with MM-Mix. Make the soil mix damp - but not soaking wet - and loosen it up with a garden spade.
The soil mix is so good, you don't need to replace it. If it gets more compact over time, you can top it off with more mix. To keep it rich, you'll add some nutrients once in a while - MM-Plantfood. The app will tell you when to give it this extra boost.
The soil mix is so good, you don't need to replace it. If it gets more compact over time, you can top it off with more mix. To keep it rich, you'll add some nutrients once in a while - MM-Plantfood. The app will tell you when to give it this extra boost.
Step 11
Lay the grid loosely on top of the soil mix.

Now your garden table is ready for sowing and planting.
Have fun!
Have fun!